During the 2010 MichCanSka trip from Michigan to Alaska we had several thousand miles to figure out the best way to lead and keep a large group of riders together and moving. In the case of Group 1 the first group on this adventure, we had several factors that kept us from braking up a group of 34+ riders into smaller more manageable groups. They were: 1) navigational knowledge and depth (especially GPS), limited availability of experienced guides, the extensive level of unknown trails, and conditions ahead of us. Although I would not recommend trying to keep this large group together on future adventures, here is some things we learned that can make it more manageable for shorter trips or events:

Trail Boss – Overall responsible for the group of riders, like the captain of a ship, they need to make sure the speed for the riding conditions and expertise levels is safe and the navigation for the route is understood and being followed,  ultimately making sure everyone gets safely to the destination. This position could also be the Pacer or even a Scout. The trail boss should decide and communicate “taking a break” plans for the ride. Planning on stopping  each hour is a good idea. Make sure you stop in areas with long straight aways and down the trail far enough so the back of the group is not left in a blind spot around a curve or just over the top of a hill.

Scout One – This rider needs to be able to navigate using paper maps combined with GPS and compass. Rides out front keying off the scout behind or pacer always keeping the lights of the group behind in view. Posting at all intersections and trail transitions. Finds the trail and markers, verifying with map and GPS to make sure group is on their planned route. It is important to get to intersections or trail transitions early to quickly identify the route and keep moving. Image the group behind as a large train, everytime you have to sit at an intersection and study your maps while the train piles up behind you makes it is hard to get it moving again. Keep your scout up front even if you have an experienced guide taking you through an area. We had guides getting lost and even though our scout who was back in the pack had the route plotted on GPS, he had to chase down the riders in front of him along with the  guide and turn them around several times.

Scout two -Having a second scout riding behind the the lead scout, gives a longer buffer zone to give the lead scout time to find the trail and keep things moving. It also works very well if the 2nd scout also has the ability to read the maps and GPS to assist and keep the lead scout on track. Rides in front of the pacer, keeping maximim distance in front while still seeing headlights in his rearview mirrior. Its critical to post at all intersections and trail transitions until the pacer is in view.

Pacer  – As the name implies this postion is responsible for setting the speed of the group. You have to envision you are pulling a train connected with rubber bands, pull too fast from a start and you will break the rubber bands and go to slow or stop alot and the train gets all bunched up. Its important that the scouts key off the pacer and don’t try and control the speed of the group themselves. This is also a good place for the Trail boss to ride if he/she has good scouts to focus on where the trail goes. Otherwise putting a mature or experienced rider in this position would work. Also, the pacer should keep in mind how many of the crossing guards they have used up and look for opportunities (long straight aways) to slow the group up to give the crossing guards a chance to get back to the front.

Crossing Guards – This turned out to be a critical position for keeping the group moving and together. We had 4 riders who road up front, behind the Pacer. At each road crossing with blind spots or obvious traffic a guard will park on the edge of the road and wave riders on. When they get to the end of the group they ride in front of the Anchor until the group stops and then go back to the front. We also found it important for the crossing guards to wear bright colored safety vest, this helped the riders spot them quickly as will as the road traffic.

The  “Anchor” – This position is critical for keeping the group together and everyone accounted for. Basically the term “No one gets left behind!” sums it up pretty well. This position is responsible for making sure everyone is accounted for, Once the group is stopped it does not move forward unless the anchor agrees. The scouts need to key off the anchor and be ready when the anchor releases them to go.  In large groups it is critical to perform head counts after any confusing trail situations or upon leaving congested areas or towns.

Rules of the trail:

1) When stopping the group for any reason, the control of when the group starts moving forward again is the responsiblity of the Anchor. This way the riders at the back of the group are given enough time to take restroom or snack break, the lead scout will be looking for a wave or the anchor will ride to the front to notify and/or start a count if needed.

2) Every rider in the group is responsible for the riders behind them, each should be looking back often to assure they can see 1-4 sleds back. If they don’t see anyone, they should first slow up and then stop if no one catches up. Remember to use hand signals!

3) Each rider needs to be prepared to post at every trail turn or transition. They need to stop if nessacary until they see the rider behind them and then make sure the following rider keys off them.

4) Keep your spot in the group, unless you notify the other riders during a break or stop, people need to know who is in front of them and behind.

5) Watch for “Crossing Guards working themselves back to the front. Although we minimized this risky activity by increasing the number of crossing guards and having them stay at the back until we stopped for a break, it may be needed in highly congested areas where a large number of road crossings are be encountered.

6) If the group does get separated, it is best if just the lead scout goes back to look for them, with GPS and knowlege of the trails this person is in the best position to find the stragglers or lost riders without getting lost themselves. This happened to us a couple of times in Group 1 and it worked perfectly, even finding a lost grossing guard who did not know where which direction the group went … This is another place where the flags helped identify someone in the group from a distance.  

6) Attitude is critical to everyone having a good time, the most difficult part of keeping a large group together is keeping everyone’s expectations set and willingness to work as a group. It will only take a couple of riders being selfish, wanting to go faster or slower or take longer breaks to upset the whole groups dynamics and make everyone miserable.

7) The  Trail boss and Anchor need to keep their eyes and ears open to how the group and individuals are doing, you may have to tweak your speeds, break times or even make arrangements to get a struggling rider up front where you can keep an eye on them or get them off the trial. The priority is  to keep everyone moving safely and ultimately to the destination.  

Additional helpful tips:  In Group 1 the lead scout and anchor used GMRS motorola radios with a full power alert button  with ear buds.  If the back of the group stopped for any reason, the anchor could press the alert button and this would let the lead scout know to slow down or stop and wait for the all clear. They had a realistic range of about 1- 3 miles (35 miles on box) kept the group from getting too stretched out. These radios had better working range then the helmet communicators currently on the market.

If you have questions or comments about this post, please reply.

I have been getting inquires lately about what we learned during our 2010 MichCanSka – Michigan to Alaska trip: Here is a few of my observations:

Safety Flags) This was a very controversial safety requirement, many of the participants were against using them, although most ended up installing them. What did we learn ? Not only did they provide the added visibility we hoped on the trail, we also uncovered an additional benefit of identifying our groups. With as many as 34 riders in a group during the trip, having the flags visually announced to the locals we had arrived in town, we also found ourselves using them to locate other members of our group in areas where other riders were on the trail or in congested areas. It really helped managing the logistics of keeping the riders together.  (Strongly recommended)

Spot Messenger) Wow! a true life and butt saver. I don’t think there is a single rider on this trip that would consider riding without one, especially in remote areas with limited cell phone range. Pressing the button to get help or rescue should be your last resort, don’t forgo the other items identified in this Blog and unnecessary put other people and resources at risk. It should be the ultimate backup plan. (absolutely mandatory)

Snow Bungees) A true back and life saver! When we were all getting stuck in a mountain pass in the Yukon this tool kept us moving and not having to spend the night in the woods. (should be mandatory)

Personal Survival Items) There were times on this trip that participants left theirs in the support vehicle because the weather and conditions were perfect at the beginning of the day. They would all agree today this was a mistake. The rescue of Group 3 in the wilderness of the Canadian Yukon, taught us all that mother nature is unforgiving, even cruel! Make it part of your trip prep, just like filling your tank with gas. (absolutely mandatory)

Additional items: If you have any questions or comments related to the safety or survival topics discussed in this Blog, please comment here.

All three groups are carrying Automatic Defibrillator (AED’s) they have to be stored in a heated case. We are using models FR2 and FRx from Philips

Each group must have a comprehensive First Aid Kit, after much research and discussions with experts in this field I am recommending each Group get at least one “Adventure Medical Kits – Fundamentals First Aid Kit” or equivalent and if you decide to get a backup the “Adventure Medical Kits – Weekender First Aid Kit” is highly recommended. Both of these kits also contain a comprehensive wilderness first aid guide and the “Fundamentals” has a Digital thermometer, Sams splint and enough stuff to support 24-30 people for up to 3 days (worst case)

Purchase Options:
Sierra Trading Post: Fundamentals kit $44.95 (Retail $110)
Amazon.com: Fundamentals kit $85.99
Sierra Trading Post: Weekender kit $34.95
Amazon.com: Weekender kit $49.99
 

 i.      Purpose:  miscellaneous personal safety items like Compass, signal mirror, whistle, waterproof matches, TinderQuik tinder, duct tape

  ii.      Recommendations: You can pick-up these items separately or buy a kit that contains all of them and more. Waterproof and storm proof matches are pretty cheap, getting a lighter is more expensive, either one will work.

 iii.      Example Options & Price:

  1. Adventure Medical S.O.L. Survival Pak for $15.99
  2. BCB Lifeboat Waterproof – Windproof – Storm Proof Matches  @ Gearwild.com for $3.89
  3. Tinder-Quik Fire Tabs @ Gearwild.com for $3.15
  4. Windmill Classic Stormproof Lighter@ REI.com for $45.00

  iv.      Additional Tips: You can pick up a fireplace firestarter pack at your local Home Depot or Lowes and cut off small rectangles and put in good zip lock bags or shrink wrap in a food saver.  If you do the later, include all of the emergency only items in one organized sealed pack.

I have explored and researched “International Medical Group” (IMG)   medical insurance through my businesses independent insurance agent I have used for  over 10 years.  In an email to me he said…

 “They are an A.M. Best “A” rated company, and a leader in the travel insurance market.  This policy appears to be the best value.  It will cover each member for medical expenses incurred during the travel time outside of the U.S.    In addition, after talking with an IMG account manager,we were informed that each person who will be snowmobiling must elect the “extreme sports rider” to cover the additional risk.”

Unfortunately, they will only cover participants of this event up to the age of 65. We tried to get them to do a special policy for this structured event and they declined

At Age 49 I have gone ahead and signed up online  for the Patriot Travel Medical Insurance® with Extreme Sports Rider for a month with zero deductable and $100,000 policy, it cost me $90.06.  For those participants who qualify for the IMG policy click here for more information and online enrollment.  There is also a phone number to call if you have additional questions.  I am still researching a solution for over age 65 and will post my results hopefully later this week..

We are in the final stages of safety planning for the 2010 MichCanSka event and have strived to make this event the standard for safety preparation for long distance snowmobile events. It is very important for the long term success of this event that we address safety planning systematically and take it very seriously.

It has come to my attention that there are still participants who have not reviewed the information on this site. This site defines what is the minimum Safety Gear required and recommended to participate in the 2010 MichCanSka event. It also addresses and provides recommendations on gear specifics, purpose, tips as well as some options on where you can purchase. This site also allows individuals to share their tips and experience, by clicking on the comment links.

 I have added to the  Safety Documents sections,  check lists to make the process easier on what items you need to plan on having for the trip. You also need to download and read the “Safety Requirements and Guidelines (final)”, read and sign the “2010 MichCanSka Safety Release” document and also fill out and follow the instructions on the “Participant Personal Information” form

Please remember it is your responsibility to check the web site regularly or subscribe to get automatic updates. If you have any questions, please email me or contact me at (903) 238-3393

 Respectfully,

Pete Pattullo

Safety Coordinator, 2010 MichCanSka

P.S. I do not have email addressed for all team members, please pass the word onto your other team members or give them a call to make sure everyone is getting the word.

We held a Safety Briefing on Monday, December 28th at the Cadillac Sands Resort in Cadillac, MI.  Guest presenter was Greg Wilkinson from the company who provides the “Spot Messenger”.

We demonstrated and discussed the best practices on utilizing the Spot Messengers, Satellite Phones, GPS’s in conjunction with the MichCanSka Command Center and other safety gear outlined in this Blog.  if you have any questions , then click on the Leave a comment link and we will do our best to address. Click on MichCanSka Briefing V1.1 to see a copy of the presentation used for this briefing

Also if you would like this blog to automatically email you when new information is posted, click on the Subscribe to feed . This way you don’t have to keep checking back…

The safety requirements for the 2010 MichCanSka event is published, click on the link to view and download or click on the “Safety Documents” page above.

Click on the link to see an example of what will be available to the Command Center, friends and family for tracking the progress of the MichCanSka event.

Part of the route for this trip takes the riders across the Rocky Mountain Range, primarily while crossing  the Canadian provinces of Alberta, British Columbia and the Yukon Territory. Most the riders including myself have little or no experience/training in avalanche conditions or rescue. The best resource on this subject is www.avalanche.ca web site. It also has a great online training course that I highly recommend everyone take. http://access.jibc.bc.ca/avalancheFirstResponse/index.htm

Purpose:  The ability for each group of riders (riding together) to communicate with the “MichCanSka Command Center”  and support vehicles will significantly improve the response time and reduce confusion in cases of breakdowns, fuel issues, lost or separated riders and emergency situations. Cell phone coverage during this event will be very limited, in most cases service only available in and around larger towns.

Recommendations: I strongly recommend each group of riders have two satellite phones preferably Iridium (best coverage). One assigned to a sled riding in the front of the group (1st three sleds) and another assigned to a sled in the back of the group (last 3 sleds).

 I also recommend each caravan of Support Vehicles have at least 2 Satellite Phones. The 1st one assigned to the first support vehicle in the group and 2nd to the last vehicle in the group. Each should be plugged into a 12V outlet and external antenna and left on at all times during. This will allow the groups to contact them directly or thru the Command Center.

•Calls from Satellite Phones:$1.39 per minute •Calls to Satellite Phones:     $2.50+ per minute (caller pays) •Text from Satellite Phones:  $0.50 per text •Text to Satellite Phones: Free (from http://messaging.iridium.com/ ) •Texting to and from Satellite Phones is the best option •Use Voice Calls only in Emergencies!

I also recommend any teams or individual who want to decrease their risk and improve their survival options, to consider renting a satellite phone for this event.    

 Example Options & Price:

  1. NetworkIP (Pete Pattullo’s Company) has agreed to sponsored 12 Satellite Phones for this event.
  2. Iridium 9505a satellite phone rental from Feb 12th to March 15th  from www.allroadsat.com $345.26 (this is all inclusive, shipping both ways, 60 outgoing minutes ($1.59 per min), free inbound calls and text, contact Sue Shorees 1-619-200-2066, mention MichCanSka and order_id 33640)

Additional Tips: Satellite Phone’s like the Iridium 9505A are only rated to operate down to +14F. To protect and keep the satellite phone in its operating temp range, it should be stored in a protective case in heated pouch or with a air-activated “Hot Hands”.  We will be discussing the best practices on using and minimizing cost of using satellite phones /  Spot Messengers during our Safety Briefing scheduled on Tuesday, December 28th    Also note there are numerous companies who rent satellite phones on the web, make sure the cost quote are total and include activation fees.

I strongly recommend everyone participating in this event to read the book “98.6 Degrees – The art of keeping YOUR ASS ALIVE!” by Cody Lundin.  $9-$12 at http://www.amazon.com/98-6-Degrees-Keeping-Your-Alive/dp/1586852345

In this book, the author stresses that a human can live without food for weeks, and without water for several days. But if the body’s core temperature dips much below the 98.6 degree mark, a person can literally die within hours. It is a concept that many don’t take seriously, but knowing what to do to maintain a safe core temperature when snowmobiling or surviving in extreme conditions could save your life.

“Excellent advice … the obvious product of a man who has gone and done it… well worth reading”  – Field & Stream

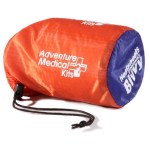
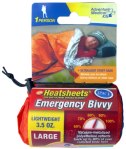
 Personal Emergency Shelter – Bivvy

fits in the palm of your hand

fits in palm of hand

             i.      Purpose: This gear is used as an emergency shelter, that you climb inside with your snowmobile suit on or off depending on the temps, it is designed to block the wind and reflect 80-90% of your body heat. Most likely use would be during a blizzard or white out… http://www.survival-gear.com/emergency-bivvy.htm

            ii.      Recommendations: There are two low cost versions on the market that come highly recommended for our purpose:  The AMK Heat sheets Emergency Bivvy  or Adventure Medical Kits Thermo-Lite 2 Bivvy have very good ratings and are inexpensive.  The “Themo-Lite 2” is a little more durable and has  venting to help with trapping moisture. See AMK Heatsheets Emergency Bivvy video.

          iii.      Examples Options & Price:

  1. Heatsheets Emergency Bivvy for 1 person @ camping.com for $11.49
  2. Thermo-Lite 2 Bivvy for 1 person@ Amazon.com for $26.45

          iv.      Additional Tips: My research shows these Bivvy’s will keep you warm in extreme cold conditions, but have a negative downside of holding in moisture, especially if used in warmer (above zero) temps where you get too hot and sweat. You might consider using the Bivvy only in extreme conditions where your snowmobile suit and Hot Hands are not enough protection from the wind and temps.

Water Resistant flashlight with Lithium batteries or wind-up

i.      Purpose: An emergency flashlight in case we have to spend the night or nights in the wilderness most likely during a blizzard or white out. It would also come in handy if we are force to work on a sled after dark.

ii.      Recommendations: There is no need to spend more than $25 on a good Water resistant LED flashlight that takes AA Lithium batteries

iii.      Example Options & Price:

  1. MegaBRITE AquaMax Self Powered Waterproof LED Flashlight @ Lowes for $18.97
  2. Wind ‘N Go Ultra Bright 1-Watt Led Waterproof Flashlight (Yellow/ …@ amazon.com for $33.00
  3. Maglite LED 2-Cell AA Black Aluminum Flashlight @ Lowes for $21.24

iv.      Additional Tips: A waterproof LED flashlight with AA Lithium would be best option, but are more expensive (over $50) The lithium batteries are not affected by the extreme cold and are the best choice, the windup or self generating flashlights are ok, but will not hold a charge in extreme cold temps and will constantly have to be cranked. If you get a water resistant flashlight like Maglite above, get AA lithium batteries and store it in a good zip lock bag and it should be fine.

Hot Hands Air-activated  warmers (150 hours)

   i.      Purpose:  These air-activated heating pads are an excellent source of emergency heat, especially in survival situations in extremely cold conditions. The body can survive for weeks without food, days without water, but only a few hours or even minutes without enough heat. They are a critical component in surviving overnight or multiple days in blizzard conditions. They also are an important part of preventing someone with serious injuries from going into shock.  

   ii.      Recommendations: Each snowmobile and rider is required to carry 150 hours of Hand warmers in their Personal Survival Kit. These are in addition to ones carried for other purposes or use during normal cold riding conditions.

   iii.      Example Options & Price:

  1. Grapper Hand warmers – 7 hour, 40 pair (280 hours)  @ George Pattullo (989) 673-6130 for $30.00
  2. Grapper mini-hand warmers 7 hour, 10 pair (70 hours) @ Cabela’s for $10.00
  3. Heatmax HotHands 2  10 hour , 10 pair (100 hours) @ Walgreens for $8.00

Additional Tips: Beyond the uses described above, you can also use hand warmers to keep your drinking water from freezing, especially if put in a small soft cooler. They will also protect electronic devices like phones, GPS and cameras with LCD displays from freezing at temps lower than -20 F. Make sure the ones you buy are fresh, they start to deteriorate after just a year, also sealing them in a food saver or ziplock helps

Utility knife / multi-tool

     i.      Purpose:  Used for cutting rope, or other things as needed

    ii.      Recommendations: A multi-tool is best, but a simple pocket knife would meet the minimum requirement.

   iii.      Example Options & Price:

  1. Basic pocket knife   @ Walmart for $8.00
  2. Leatherman Kick Tool @ Cabela’s for $33.00
  3. Leatherman Surge Tool@ Cabela’s for $90.00

   iv.      Additional Tips: I like to mount a multi-tool sheath to my handlebars and have it instantly available to use.

72+ hour supply of food and water

   i.      Purpose:  Emergency supply of food and water in case we have to spend the night or nights in the wilderness most likely during a blizzard or white out.

  ii.      Recommendations: The minimum amount of water ration recommended for a 72 hour period is 1 liter or 2- 16 oz bottles, minimally you should pack 6-8 high energy bars (high protein, high Carb), this is not the time to diet, you will loose weight no matter how much many calories you are able to consume at this point. Stay away from bars that are gooey or nougaty in consistency, they will freeze solid and will be impossible to eat, unless you like popsicles at -20 below.   

   iii.      Example Options & Price:

  1. You will get your best deal at Walmart or local Grocery.
  2. Ensign Peak Insulated Cooler Bag @ Amazon.com $3.95

  iv.      Additional Tips: Remember these are emergency supplies and should be kept separate from your everyday snacks, drinks and meals planned on the trail. Using a small insulated cooler bag with a Hot Hands, will keep your drinks from freezing on those -20+ F days

Snobunje or equivalent method of getting a sled unstuck

  i.      Purpose:  The Snobunje is a tool that uses very strong stretch cord bundled in a corrugated vinyl tube. It has a hook on one end that attaches to the ski of the stuck sled and either another sled or has handle on the other end. It maximizes the pulling forces your body or another sled can produce when pulling out a stuck snowmobile.

  ii.      Recommendations: There are two versions of the Snobunje, it is recommended you have at least one of these (or another proven method) for each Team participating in the event. The Rattler model is for sled to person pulling, the Cobra is for sled to sled.     www.snobunje.com

  iii.      Example Options & Price:

  1. Snobunje Rattler @ Pattullo & Sons Sports (989) 673-6130 $45.00 (at cost)
  2. Snobunje Cobra@ Pattullo & Sons Sports (989) 673-6130 $55.00 (at cost)

   iv.      Additional Tips: If you can afford it get one of each… you’ll be glad you did.

Satellite Transponder (Spot Messenger)

      i.      Purpose:  The SPOT Messenger provides a vital line of communication with international rescue coordination centers, the MichCanSka Command Center and friends and family. It provides your GPS location and status based on situation and need. Using 100% satellite technology, SPOT works virtually anywhere in the world, even where cell phones don’t all with the push of a button

    ii.       Recommendations: Each Team shall be responsible for accruing or purchasing at least one Spot Messenger and signing up for a minimum of a 1 year basic subscription with tracking option. (minimally covering the event period Feb 1st, 2010 to March 31st, 2010. ), Spot has launched a new version called the “SPOT Satellite GPS Messenger “(Spot-2 unit), the advantages of the new model is its 50% smaller, lighter, easier to use and has an additional button to program a special message to. The disadvantage of this model is the batteries last 1/3 less, it is only rated to -22F (Spot-1 original -40F).

  iii.      Example Options & Price:

  1. Cabelas has a special with the manufacture http://www.findmespot.com/cabelas/ good until December 31st, 2009.  The rebate is for only the original Spot-1 unit

             Option 1) the unit and 2 yr service plan w/tracking, total cost of $300 after rebate

             Option 2) the unit and 1 yr service plan w/tracking, cost of $250 after rebate

      2.   Spot messenger (original Spot-1) unit w/ 1 yr service plan w/tracking @ Pattullo & Sons Sports (989) 673-6130 $175 (at cost after rebate)

      3.   Spot Satellite GPS Messenger (New Spot-2) unit w/ 1 yr service plan w/tracking @ Pattullo & Sons Sports $255 (at cost)

   iv.      Additional Tips: The Spot Messenger shall be assigned to a rider on the team and worn on the person’s body preferably in a location unobstructed from the sky above, (i.e. an outside pocket on sleeve or chest). It is highly recommended that the individual download the user guide from the www.findmespot.com and/or attend a safety briefing detailing the optimal use of this technology.

Enter your email address to subscribe to this blog and receive notifications of new posts by email.

Join 9 other subscribers